The most important thing you need to start a podcast is a great idea. However, at some point, you will also need to invest in some podcast equipment. But the best podcast equipment doesn’t always have to be the most expensive. This includes audio recording equipment first and foremost, but there may be more to it than you’ve initially considered.
To guide you through every step, here’s how to choose podcast equipment that will help you bring that idea to life and ears…
What equipment is needed for your podcast?
The equipment you need to start a podcast mostly has to do two basic things: record your vocals (and maybe video) and make it possible to edit them.
Simple! Well, it can be. If you’re excited about the scrappy, DIY feel, you can do all this with just a laptop or even a smartphone. If you’d like a basic level of production value — which most podcasters do — you can spend a reasonable amount of money on the right recording equipment for your needs. And if you want to get completely obsessive about it, you can spend an unreasonable amount of money and time!
Whatever your budget and your tolerance for getting into the weeds, here’s the podcast equipment you need.
- You need a microphone
- Podcast equipment to improve recording quality
- Be a listener first with a pair of headphones
- Take it audio-visual with a camera
- Using a digital audio workstation (DAW)
- Final thoughts
You need a microphone
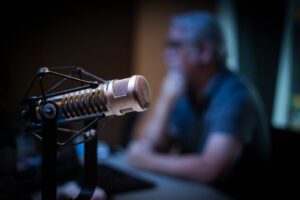
While it’s absolutely true that you don’t need a lot of hi-tech equipment to start a podcast, there is one thing every podcaster must have: a podcast microphone.
Yes, you could use the built-in mic in your laptop or phone. However, the sound quality will be far below the baseline level most listeners expect from even the scrappiest podcasts.
The good news is you don’t have to spend a lot of money to get a microphone that is easy to use and produces an almost-professional sound. Here’s what to look for.
USB microphone vs. XLR microphone
The first specification to consider when shopping for your podcast microphone is whether you want a USB microphone or an XLR microphone. The short answer is that you probably want a USB model: here’s why.
XLR microphones
XLR mics are the kind used by professional musicians and performers, and podcasters with sweet, sweet recording deals. These mics capture an analog signal, which means that on top of coughing up for the XLR mic, you’ll also need to buy an external audio interface to allow your mic to speak to your computer.
USB microphones
USB mics, on the other hand, do that analog-to-digital conversion for you, and don’t require as much set up. Most are plug-and-play, but fear not, audiophiles: You can definitely find models that allow for more hands-on mixing.
Although XLR mics remain the professional default, the rise of amateur podcasting has seen manufacturers of USB mics up their game. When used correctly, you can get a sound quality from a USB mic that all but the best-trained listener won’t be able to tell apart from XLR microphones. (And if someone is using your podcast purely as a listening test, you have bigger problems with your content than with your podcast equipment.)
The bottom line
If you’re starting out, we strongly — STRONGLY — recommend you buy a USB microphone, rather than an XLR mic.
Ultimately, most podcasters want a microphone that:
- Doesn’t require them to read the manual before they use it. (When was the last time you read a manual for anything you bought? IKEA furniture doesn’t count.)
- Delivers sound quality that’s good enough not to be distracting…
- …At a price lower than the cost of a used car or very expensive coffee machine.
USB mics do all of these things better than XLR mics. You can always upgrade later, after you’ve landed your own sweet, sweet podcasting deal.
The best USB mic under $100: Samson Q2U
There’s a reason the Samson Q2U is widely used by podcasters. It’s less than $100, making it an excellent starter option, and sounds much more expensive, especially in the right recording environment.
This is actually a bit of a cheat in the USB mic vs. XLR mic battle, since the Q2U features an XLR connector and XLR cable, so you can also use it as an XLR mic. But that’s just one more reason to love it.
The Q2U comes packaged with some of the podcasting equipment we’re about to recommend, including a pop filter. It also has a zero latency headphone jack: Basically you can plug in your headphones and hear your voice in real time. You’ll see more expensive models brag about this feature, so to get it for this price is pretty nice.
Dynamic microphone vs. condenser microphone
The other major microphone spec to consider is whether you want a dynamic mic or a condenser mic. The Samson Q2U, for example, is a dynamic model.
This decision is a little less clear cut than USB or XLR. Here are the pros and cons of each.
Condenser microphones
Condenser microphones produce a better audio quality than their dynamic counterparts. They’re used in professional recording studios, especially by musicians.
However, before you rush out to grab your Blue Yeti, keep in mind that condenser microphones also pick up more ambient noise.
If you’re recording in your apartment, and you can hear your neighbor playing the “Pink Panther” theme on a saxophone through your wall, it will probably end up on your recording. Ditto any microphone rustling, or shifting in your seat.
Dynamic microphones
As you might expect, the pros and cons of dynamic microphones are the reverse of those for condensers. You lose some of that audio quality, and the microphone only picks up noises made very close to its grille.
The bottom line
Whether you want a dynamic or condenser mic depends on your priorities. If you want the best sound possible, and you’re pretty sure you can control the ambient noise, you’ll probably prefer a condenser. If you know you’re going to be recording somewhere even moderately loud, and you don’t mind sitting close to your microphone, a dynamic mic is probably a better choice.
The condenser microphone on your favorite podcast host’s desk: Blue Yeti
How you feel about Blue’s Yeti model depends on where you sit in the dynamic vs. condenser debate. It’s a condenser mic, so diehard dynamic users will turn up their noses. But if that’s what you’re after, a lot of podcasters swear by this one.
At about $130, it’s more expensive than the Samsung Q2U, but it also has more features, including a mute button, the option to choose between different polar patterns (where sound is picked up from), and a dial to control the amplification of your microphone (known as gain.)
Also, it looks like something you would see in a professional podcast studio. If that’s important to you.
Podcast equipment to improve recording quality
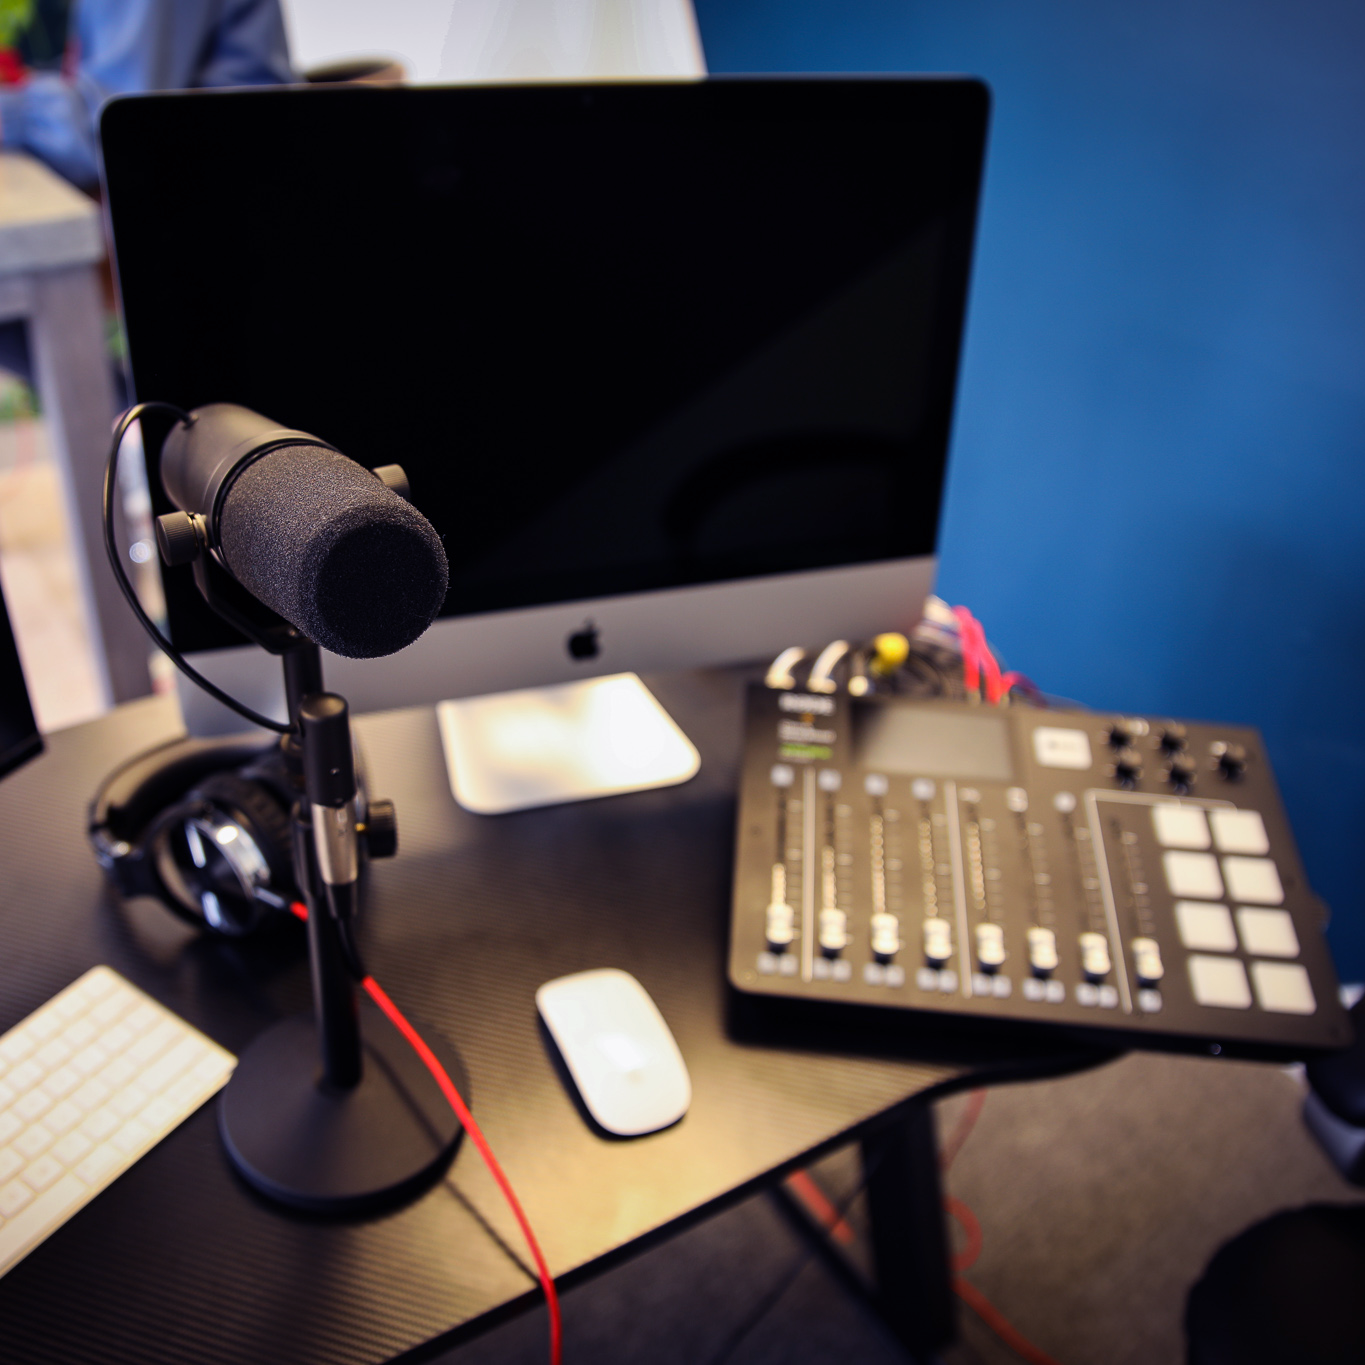
One way to improve the quality of the sound your microphone picks up is to improve your recording setup. Here are a couple of extra pieces of podcast equipment that can help.
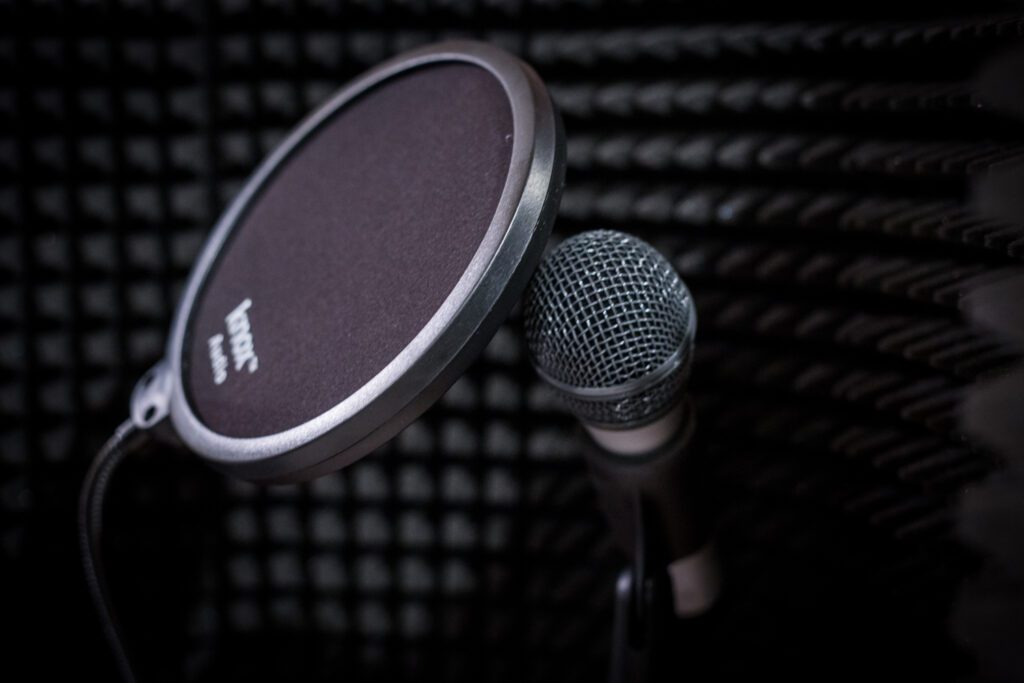
Pop filter
Say the sentence “Bobby Pepper taught the king to Google.” If you say that into a microphone and play it back, you’ll hear that some of the letters — notably p, t, k, b, d and g — sound like little “pops.”
These are called plosives, and they can be very distracting to listeners. Now you know what they are, you’ll start noticing when other people do them in the wild. Sorry!
Fortunately, you can help dampen those tiny audio explosions with a very simple piece of equipment called a pop filter. These usually take the form of a fine mesh screen that goes between your mouth and the microphone, although they come in all shapes, sizes and materials. As the name suggests, pop filters filter out the pops made by plosives.
The no-frills old reliable: Auphonix Pop Filter Screen
As with everything in podcasting equipment, you can spend a lot or a little on pop filters. Save your money and choose one that’s tried and trusted.
At $25, the Auphonix Pop Filter Screen has over 3,300 five-star reviews on Amazon. It screws on to a microphone stand, and you can adjust the distance between it and the microphone to make sure you’re still picking up your voice. Save your money for other audio equipment!
Soundproofing
Even if you’re using a dynamic microphone, it’s a good idea to prevent as much background noise as possible sneaking into your recording.
You probably already have at least some soundproofing material in your home, in the form of anything fabric. That means clothes, blankets, pillows: All of these make excellent sound-dampening equipment. Which explains why many professional podcasters turned their closets into makeshift recording studios during the COVID-19 pandemic.
However, you can also go the more professional route, and buy soundproofing panels for the wall, or a screen that goes around your microphone.
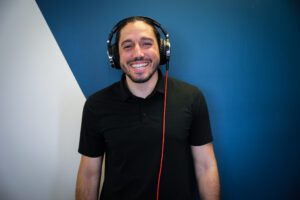
Be a listener first with a pair of headphones
Podcasters don’t just wear headphones to look cool in their profile pictures. Using headphones while you’re recording cuts out feedback that your microphone might otherwise pick up from the computer speakers. It also enables you to hear what your own voice will sound like on the recording, so you can check your microphone is working and hear any weird distortions or background noises.
You can just throw on the same headphones you use for gaming or listening to podcasts, and they’ll do the basic thing you need. But if you want to get super nerdy about it, here are three specifications to consider when buying headphones for podcasting:
-
Noise canceling
When you’re shopping for headphones as a listener, having a noise canceling option is a desirable feature. However, when you’re the one recording a podcast, you need to hear how your audio will sound in its rawest form, so you know what you’re working with at the editing stage. Noise cancellation can also cancel that out. Save this feature for when you’re on the bus.
-
Open-back vs. closed-back
On open-back headphones, the ear cup is covered only by a thin mesh or grill, which means sound can escape from the speaker. In closed-back headphones, the back of the earpiece is covered.
If you want to get super into your recording setup, you could have two pairs of headphones: a closed-back pair for recording and an open-back pair for editing.
Open-back headphones allow sound to escape through that uninsulated ear cup. This means you get a more natural sound, but it also means you’ll pick up lots of background sound, which is distracting when you’re recording.
In closed-back headphones, low-frequency sounds are amplified, which can make the audio sound distorted. That’s why open-backs work better for editing. But since closed-backs don’t create as much sound leakage, it’s also much easier to hear your audio as your record.
-
Wired headphones

Wireless headphones give us the freedom to wander around without getting caught on random hooks, cupboard edges, and pretty much every other sharp edge in the house.However, sound travels faster over a cable than through the air, so you may experience more latency with wireless headphones, compared to wired versions. And wires don’t run out of battery power mid-interview. Save the wireless headphones for when you’re the listener, not the host.
The best podcast headphones under $100: Audio-Technica ATH-M20x Headphones
By now you know that it’s possible to spend as much money as you have access to on podcast equipment. But it’s not necessary. For less than $50, the Audio-Technica ATH-M20x headphones have all the specs you need, and do a respectable job that competes with much more expensive models. Not noise-canceling: Check. Closed-back: Check. Wired: Check. For $20 more, you can also get a headphone amplifier, which is helpful if you plan to use multiple microphones in the same space.
Take it audio-visual with a camera
Podcasting used to be the domain of people who liked to entertain but didn’t like to get out of their pyjamas or worry about food in their teeth. Alas, times have changed, and no article about the besting podcast equipment would be complete without mentioning cameras.
More podcasters are choosing to record their interviews as videos as well as audio. It’s a way to get more out of the same piece of content. The audio track becomes the podcast episode, and you can upload the video to your YouTube channel. You can also post video clips on your social media: People are more likely to share a video than a 30-second audio clip.
SquadCast allows you to easily record your interviews as audio and high definition video. That’s a resolution of 720 pixels x 1280 pixels, and 30 frames per second. That’s in line with the industry standard: any higher quality than that, and you start getting file sizes so large you have to deal with buffering, and you lose that quality anyway.
As far as specs, look for a camera that can record at a resolution of 720p x 1280p and a frame-rate of 30 frames per second. Here’s what else to look out for:
-
Budget
Cameras can vary in price even more than other types of podcasting equipment. If only the best will do, you can spend thousands on professional-grade cameras favored by YouTubers. If you’re good with a rough-and-ready look, you can even use your smartphone camera, or the webcam you bought for all those Zoom calls.
Before you begin searching, decide how important video is to your show, and how much you’re willing to spend.
-
Recording time
Some cameras, especially still cameras, limit recording sessions to a measly 30 minutes. If you prefer to do longer episodes, you’ll need a camera that allows for that.
If money is no object, choose a camcorder. These provide the highest possible video quality, and are portable for on the go recording. Keep in mind that you’ll also need to buy an HDMI capture card to record the video onto your computer — an additional expense.
If you want to do video but you don’t feel the need to compete with “Avatar” on visuals, go for an external webcam. You can use the one you bought for Zoom, but there are some higher spec ones available that do a perfectly decent job of recording video for your podcast.
The webcam that gets the job done: Logitech Brio 4K Webcam
At $150-$200, the Logitech Brio 4K Webcam is still a not-inconsiderable investment for an audio-focused medium. But if you’re committed to adding video, it’s worth the money. It can shoot in Ultra HD 4K, but you can also choose to shoot at 1080p and 720p. It autofocuses and adjusts to the light, so no need to worry about fuzzy footage. And you can zoom, so you don’t have to look tiny on the screen.
Using a digital audio workstation (DAW)
Once you’ve recorded your podcast, you need somewhere to edit it. This is usually done in a type of software called a digital audio workstation (DAW). Full disclosure: You can also record your podcast using a DAW, but without blowing our own horn too loud, here are all the reasons why SquadCast is the best podcast recording software.
Back to digital audio workstations. Which one you use will depend on how involved you want to get with the editing process, and your interest and stamina for learning what can be quite complicated software.
It will also depend on your budget. There are an impressive number of free DAWs available for Windows and Mac computers. Once you get the hang of those, you can also choose to level up to premium alternatives.
In no particular order, here are the top three DAWs for podcasters who are starting out.
-
Audacity
Price: Free
Compatibility: Windows, MacOS and Linux
An oldie — and it looks it — but a goodie. Audacity was created by two students in 1999, and the interface got stuck somewhere in the early ‘00s. But looks can be deceiving.
Created as an open source project, Audacity is packed with features that professional audio editors appreciate. You can edit multiple tracks, add music and sound effects, and change levels. Third-party plug-ins increase the scope even further.
The clunky interface can be a steep learning curve for total beginners: But once you get the hang of it, you’ll realize why this has been a goldmine for podcasters.
-
GarageBand
Price: Free
Compatibility: MacOS and Linux
GarageBand is good for more than the angst-ridden emo songs you created as a teenager. “Umbrella,” the song that made Rihanna a superstar, was built on a default drum loop in GarageBand (Vintage Funk Kit 03, if you’re interested.) And it also works for podcast editing.
You can nerd out about your vocal tracks in GarageBand, and the learning curve might be a little shallower for experienced Apple nerds than, say, Audacity. You can also, of course, add cool DIY music.
If you get really into podcasting and editing, you will probably eventually upgrade away from GarageBand. But if you already have a Mac, it’s a great — free — place to start.
-
Adobe Audition
Price: Seven-day free trial and then $20.99 a month
Compatibility: Windows, MacOS
Once you’ve got to grips with audio editing in one of the free digital audio workstations, you might consider upgrading to premium software. Adobe Audition introduces you to extra features, like the ability to adjust or erase background noise, remove hisses and pops, and smooth out vocals. You can also choose from a library of royalty-free sound effects.
It’s another expense. But there’s a free trial, so you can always try it and decide if you think the extra features and easier interface are worth the price.
Podcast equipment: final thoughts
By now you’ve probably realized that not all podcasts are created or priced equally. You can get very into the weeds on things like the quality of your recording, your recording set up, and your editing process. And you can dig very deep into your wallet to pay for podcasting equipment!
Ultimately, for something to count as the best podcast equipment for you, it has to strike the balance between your ambitions and your budget. Identify your areas of obsession: Maybe you’re willing to save money on a microphone in the name of also having video. Maybe you’d rather splurge on a microphone and keep everything audio.
Whatever you want to do, we look forward to hearing it.
Zachariah Moreno is the co-founder, CEO, & CTO of SquadCast. He is also a podcaster, author, developer, and designer. He and his team are on a mission to amplify collaboration.